


")


")


At some point in time, you will foray into the realm of web development. With the many frameworks out there, you may be confused as to where to start. Our recommendation is Django for building apps beautifully and efficiently, with a database of your choice. (Almost every web app needs a database.) In this guide, we’ll use PostgreSQL as an example of how to set up a Django app with a PostgreSQL database, all done via the Windows command prompt.
What is a web framework and what is Django?
A web framework provides a set of components to help developers build and deploy web applications. Most web applications require a similar set of functionalities: user authentication, uploading files, handling data, etc. Web framework provides developers with ready-made components that perform those functionalities, so that developers do not need to waste time writing the same code over and over again.
Django is a free and open-source framework written in Python for developing web applications, and to do it faster and easier, because it already comes with certain applications like user authorization and email sending which you can easily plug in to your existing application. It follows the Don’t Repeat Yourself (DRY) principle, so you don’t need to rewrite existing code. On top of that, it has a powerful template (files with HTML code used to render data) engine and its own markup language. Django is especially useful for database-driven websites because of it’s Model-View-Template (MVT), and there’s hardly any application without a database. The MVT allows developers to change the visual part of an app without affecting the business part of the logic, and vice versa. As of now, Django officially supports four databases: PostgreSQL, MySQL, SQLite, and Oracle.
What is PostgreSQL?
PostgreSQL is a free and open-source relational database management system (RDBMS). An RDBMSorganises data in tables of rows and columns (non-relational databases store data in non-tabular forms, whatever they may be). Like many other RDBMSs, PostgreSQL uses structured query language (SQL) to manage and query data.
Three of the most widely implemented open-source RDBMSs are SQLite, MySQL and PostgreSQL. When a web application is set up using Django, an SQLite database is automatically set up for the backend of the application. However, we can customise it to use another RDBMS. This blog post walks you through the process of doing just that, implementing PostgreSQL with Django as an example.
Setting up (it’s as easy as 1, 2, 3!)
1. Set up Python and set up a virtual environment
Django is a Python framework, so before you proceed any further, make sure you install Python or already have Python installed.
To check whether you already have Python installed, enter this in your command prompt:
python –version
If you have python installed already, you should see:
Python [the version that is installed]
If you do not have Python installed or your version is older than Python 3, we’d recommend that you install the lastest version of Python.
Once you have Python, you need pip. pip is a package manager for Python. It helps to easily install and uninstall Python packages (Django is a Python package!). If the Python you just installed is version 3 or above, pip is already automatically installed.
Now we’ll need to set up a virtual environment. This is incredibly important as you’re building a large app and you don’t want different versions of different components to conflict with one another. You can read up more about virtual environments in the official documentation.
Install virtualenv and virtualenvwrapper by entering the following in your command prompt:
pip install virtualenvwrapper-win
We’ll leave all this aside for now and before we use pip to download the Django package, we’ll install PostgreSQL first.
2. Install PostgreSQL
Go to the download page for PostgreSQL installers and install the latest version of PostgreSQL that is suitable to your system (we’ll assume that you’re using a 64-bit Windows).

The installation process is pretty standard but here are some things you should look out for:

In the PostgreSQL Setup Wizard, in the Select Components page, uncheck the components that you do not want to install, or just leave it be. If you uncheck anything, don’t worry, just launch the installer later and select the component you need, and PostgreSQL will be updated accordingly.

At the Password page, enter the password for the database superuser (postgres). This account will be used to access your SQL Shell (pqsl) later on.

At the Port page, choose the port number that the server should listen on, or stick to the default 5432. Just make sure that the port is not currently used by any other applications.
Proceed with the rest of the installation. To verify the installation, find the SQL Shell (pqsl) program and click on it to launch it. The pqsl command line will appear.

Open the command line. Accept the default for the Server, Database, Port, and Username fields by pressing Enter. However, at the Password field, you must enter the password that you chose during in the Setup Wizard.

If you your window is more or less the same as the above, then you have successfully installed PostgreSQL!
3. Install Django and integrate with PostgreSQL
With pip, Django can be easily installed from the command line with a simple one-line instruction.
Before we do that, create a folder for your project (suppose it’s called yourproject) in a directory of your choice and move to that directory via the command prompt. Once you’re in that directory, create a virtual environment by typing:
virtualenv yourprojectenv
You can give the environment any name you want. Now activate the environment with:
yourprojectenv\Scripts\activate
This must be done before we install any applications within the virtual environment.
If the virtual environment is activated, you would see (yourprojectenv) in the command prompt as shown below. To exit the virtual environment, simply type “deactivate,” but leave the virtual environment

With the virtual environment active, install Django.
pip install Django
We will also need to install psycopg2. psycopg2 is a package that will allow Django to use the PostgreSQL database that we just configured. Similarly, to install, write:
pip install psycopg2
(For ways to integrate with other databases, you can refer to the official documentation.)
Now, it’s time to start a Django project! This is done within our yourproject directory. Start the project by typing: (Make sure to add the dot at the end of the command so that this is set up correctly.)
Django-admin startproject yourproject .
Now, we’ve created a child directory of the same name and a management script within the current directory.
We are ready to configure the Django database settings! In the project directory, find the file “settings.py”. This file contains the configurations for the app. Scroll down to a section labelled “DATABASES”. The section should currently look like this:
DATABASES = {‘default’: {‘ENGINE’: ‘django.db.backends.sqlite3’,‘NAME’: os.path.join(BASE_DIR, ‘db.sqlite3’),}}
Yes, that’s right, you see SQLite. That’s what we meant when we said that Django is automatically configured with SQLite. We’ll need to change this section to tell Django to use PostgreSQL instead. The change is simple. The text in red are what we need to amend or add:
DATABASES = {‘default’: {‘ENGINE’: ‘django.db.backends.postgresql_psycopg2’,‘NAME’: ‘yourproject’,‘USER’: ‘yourprojectuser’,‘PASSWORD’: ‘password’,‘HOST’: ‘localhost’,‘PORT’: ‘’,}}
The username and password you set there will be used later when we create a superuser for the database. Create the administrative account by typing:
python manage.py createsuperuser
You will be prompted to provide login credentials.
Now that everything is set up, test whether your database is performing by running the Django development server.
python manage.py runserver
Test it by going to the development server which can be found on your command prompt.

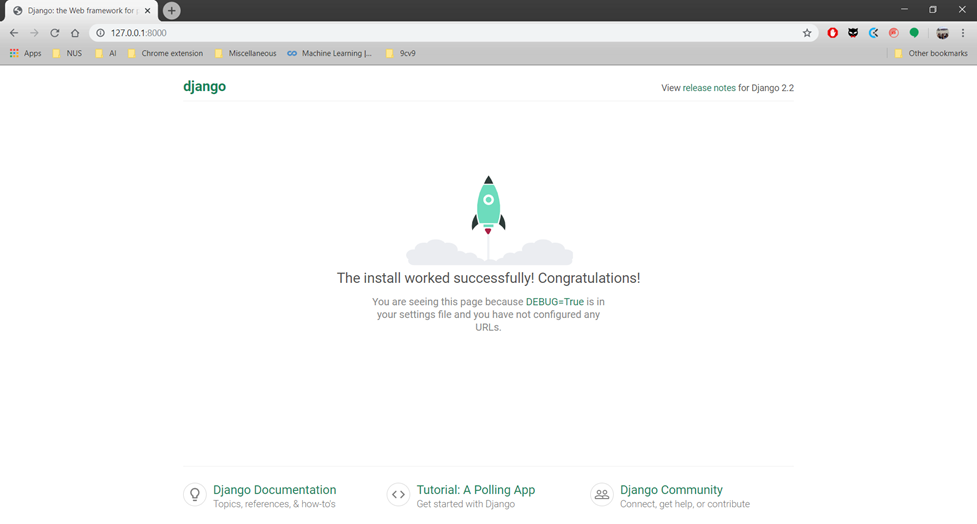
You should see the following homepage, which means that the app has been deployed successfully!
Appending /admin to the url will redirect you to the Django administration page where you can log in with the same credentials that you earlier used to create a superuser.

Congratulations! You have set up a Django app with PostgreSQL as the database! While Django comes in handy with SQLite, we’d certainly benefit a lot more from a full-featured RDMS like PostgreSQL. Now you’re on your way to making a beautiful web application.

")


